THE FRAMING WORKSHOP
Framing, step by step
From a printed landscape to a finished frame: cut the mat, assemble the layers and install the right hanging hardware.
Your print size
Cutting measurements
- Printed sheet · width × height
- 24 × 30 cm
- Mat window
- 23.4 × 29.4 cm
- Mat outside / frame fitting size
- 30 × 36 cm
- Visible mat border · each side
- 3.3 cm
Worked examples, not a frame specification: the mat uses a 3 mm overlap per edge. The frame’s external size will be larger. Measure your print and frame before buying or cutting; a ready-made frame may need a custom mat.
Before you begin
Acid-free mat and mounting board, a cutting mat, metal ruler, pencil, bevel mat cutter, conservation paper hinges, a frame with glazing and backing, compatible hangers, suitable wall fixings, a level and a screwdriver. This guide covers paper prints behind a window mat, not stretched canvas.
STEP 01
Measure & cut the mat
- Measure the actual printed sheet first; the example below assumes a full-size print with no extra paper border. Match the mat’s outside dimensions to the frame’s internal fitting size, not its external edges.
- On the back of acid-free mat board, center and mark the window shown below. It overlaps the artwork by 3 mm on every edge; check that this does not cover a signature or important detail.
- Cut the outside on a cutting mat with a metal ruler. Use a bevel mat cutter for the window, making controlled passes away from your hand. Test on scrap board first; a framing shop can cut the window for you.
Center the window by marking 3.3 cm inward from each outside edge. Keep all four margins equal for this example.
Tools for this step · how to use them
OLFA utility knife for outside edges, a metal ruler and a cutting mat larger than the mat board. For the window, use a purpose-made bevel mat cutter such as Logan 4000, or order a pre-cut mat.
- Cutting mat, ruler & pencil
- Lay the board flat on the cutting mat. Measure the outside and window dimensions on the back, mark lightly in pencil, then hold a non-slip metal ruler firmly with fingers clear of the cutting line.
- OLFA utility knife · outside edges
- Use a sharp blade at the minimum practical extension and lock it as the tool maker instructs. Cut along the ruler in controlled passes, away from your hands. Do not cut a bevel window freehand; retract the blade after use.
- Logan 4000 / guided bevel cutter · window
- Use a compatible guide and a sacrificial backing sheet. Set blade depth for your board thickness according to the manual, test on scrap and use the cutter’s start/stop marks to avoid overcut corners. Rotate the board for each edge; a pre-cut mat skips this operation.
STEP 02
Mount the print & assemble the frame
- Let the print dry fully according to the paper and printer instructions. Clean and dry both sides of the glazing; handle glass edges carefully and keep the frame face-down on a soft, clean surface.
- Center the artwork behind the window. Attach its top edge to an acid-free mounting board with two conservation-grade paper T-hinges; leave the sides and bottom free to expand. Do not tape all four edges or stick tape on the image.
- From front to back, fit glazing → window mat → mounted artwork → backing board. Keep the print clear of the glazing, remove dust, then close the frame’s supplied clips without forcing them. Follow the frame maker’s assembly instructions.
Tools for this step · how to use them
- Lineco Neutral pH Adhesive & paper hinges
- For a replaceable print, test the adhesive and hinge paper on scrap of the same stock for staining, curling and ink bleed. If compatible, apply a tiny amount with a small brush only where the hinge method requires it; position the top-edge T-hinges and allow them to dry as instructed. Never coat the whole print or glue the image surface.
- Photo corners · optional glue-free alternative
- Choose corners suitable for the paper thickness. Attach them to the mounting board, not the print, then slip the sheet into them without squeezing it. Check that the window mat hides them and the paper has room to move; use either this method or suitable hinges, not both to clamp the sheet.
- Clean cloth & supplied frame clips
- Clean and fully dry the glazing with a suitable lint-free cloth before adding the mat, mounted print and backing. Close only the supplied retaining clips, following the frame instructions; do not improvise with a knife or force a stack that is too thick.
Do not use household glue, hot glue or double-sided tape on the print. Neutral pH does not guarantee reversibility or compatibility; use a professional for moisture-sensitive inkjet paper or valuable artwork.
STEP 03
Fit the hardware & hang
- Weigh the complete frame with glazing and backing. Choose frame fittings and wall anchors rated for that weight and your wall material; do not choose them by print size alone.
- Use the frame’s supplied hanging fittings where possible. For wooden frames, fit D-rings only into sound side rails with manufacturer-approved screws that cannot pass through the front. Metal frames need compatible channel fittings, not wood screws.
- Check for hidden cables and pipes before drilling. Mark and level the fixing points; use studs, masonry fixings or hollow-wall anchors as appropriate. Hang on the rated fittings, add lower corner bumpers and check stability before letting go.
Tools for this step · how to use them
- Scale, fittings & screwdriver
- Weigh the assembled frame first. Select fittings rated for that weight and compatible with the frame, then use the correct screwdriver and approved screw lengths. Attach D-rings to sound wooden rails; use channel fittings on metal frames. Stop if a rail splits or a screw could reach the front.
- Detector, level & wall fixings
- Check for concealed services before drilling; a detector is not a guarantee that a wall is clear. Use a level to mark the fixing points. Match anchors and drill bits to the wall and follow their installation instructions. If uncertain, stop and ask an installer; never drill into a suspected cable or pipe location.
- Stand / wall hangers & corner bumpers
- For tabletop display, open the supplied stand on a stable level surface. For wall display, seat the frame fully on its rated fittings, check that it is level and add lower corner bumpers. Keep supporting the frame until it is secure; get lifting help for a heavy frame.
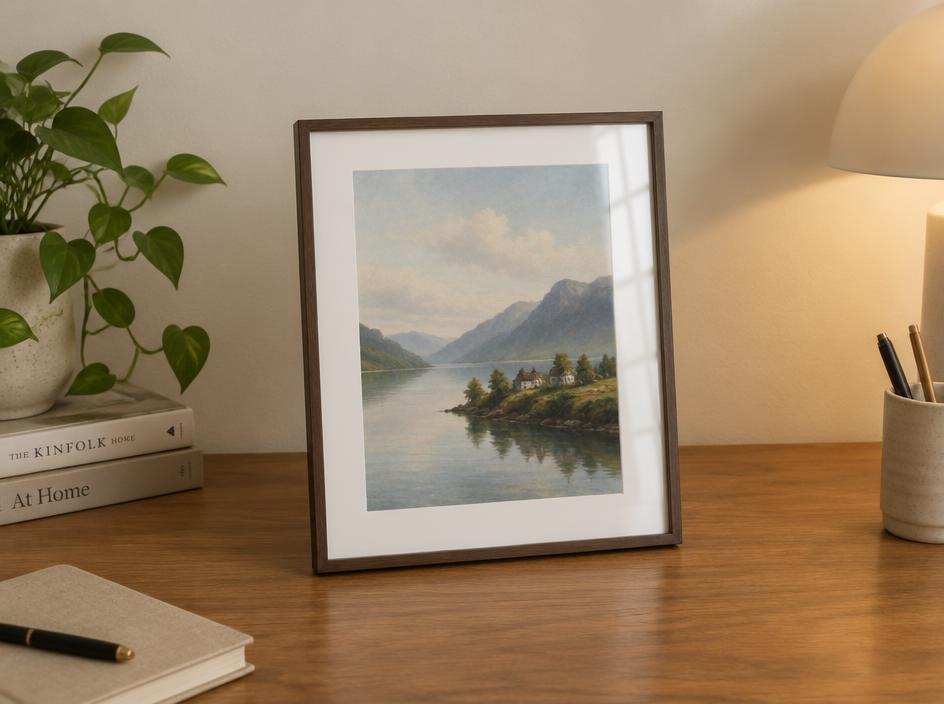
A tabletop frame needs a stable stand on a level shelf. For wall display, use its rated hanger; never hang it from the stand.
The final check
Check for dust, an even mat and secure clips. Keep paper artwork away from direct sunlight and damp walls. For valuable prints, fragile glazing or uncertain wall fixings, use a professional framer or installer.
Create your next artworkFraming questions, answered
- How long does it take to frame a print?
- There is no single completion time: a ready-made frame with a pre-cut mat needs fewer operations than cutting a mat and installing new wall fittings. Allow separate time for measuring, a practice cut, cleaning, assembly and hanging. Print drying and adhesive drying are additional; follow the paper, printer and adhesive maker’s instructions before closing the frame. We have not timed these projects, so cannot give a verified minute-by-minute estimate. For a first attempt or a larger glazed frame, leave extra time and do not rush cutting or installation.
- Which tool and adhesive brands are recommended?
- The guide uses OLFA utility knives for mat outside edges, Logan 4000 bevel mat cutters with a compatible guide for windows, and Lineco Neutral pH Adhesive with suitable paper hinges for replaceable prints. These are examples, not required purchases. Check the exact model, board thickness and guide length. Test adhesive on scrap of the same paper; neutral pH does not guarantee compatibility or reversibility. Pre-cut mats and non-adhesive photo corners can avoid some cutting or gluing. For valuable or moisture-sensitive prints, use a professional framer. Choose hangers by the assembled frame’s actual weight and wall material, not the brand or print size alone.
- How much should I budget for framing?
- Our existing rough material budgets are US$25–45 for a 24 × 30 cm print, US$40–75 for 30 × 40 cm, and US$70–135 for 40 × 50 cm. The smaller example includes a glazed frame, mat and mounting supplies; the medium example includes a slim wood or metal frame, mat, backing and fittings; the larger paper-print example uses a solid-wood frame, mat and rated fittings. These are approximate retail planning ranges, not current quotes or guaranteed totals. New tool purchases, printing, delivery, taxes and professional labor are not included; local prices and custom frame-fitting sizes can change the total. Ask a local supplier for a quote using the mat outside / frame fitting dimensions above, not just the print size.